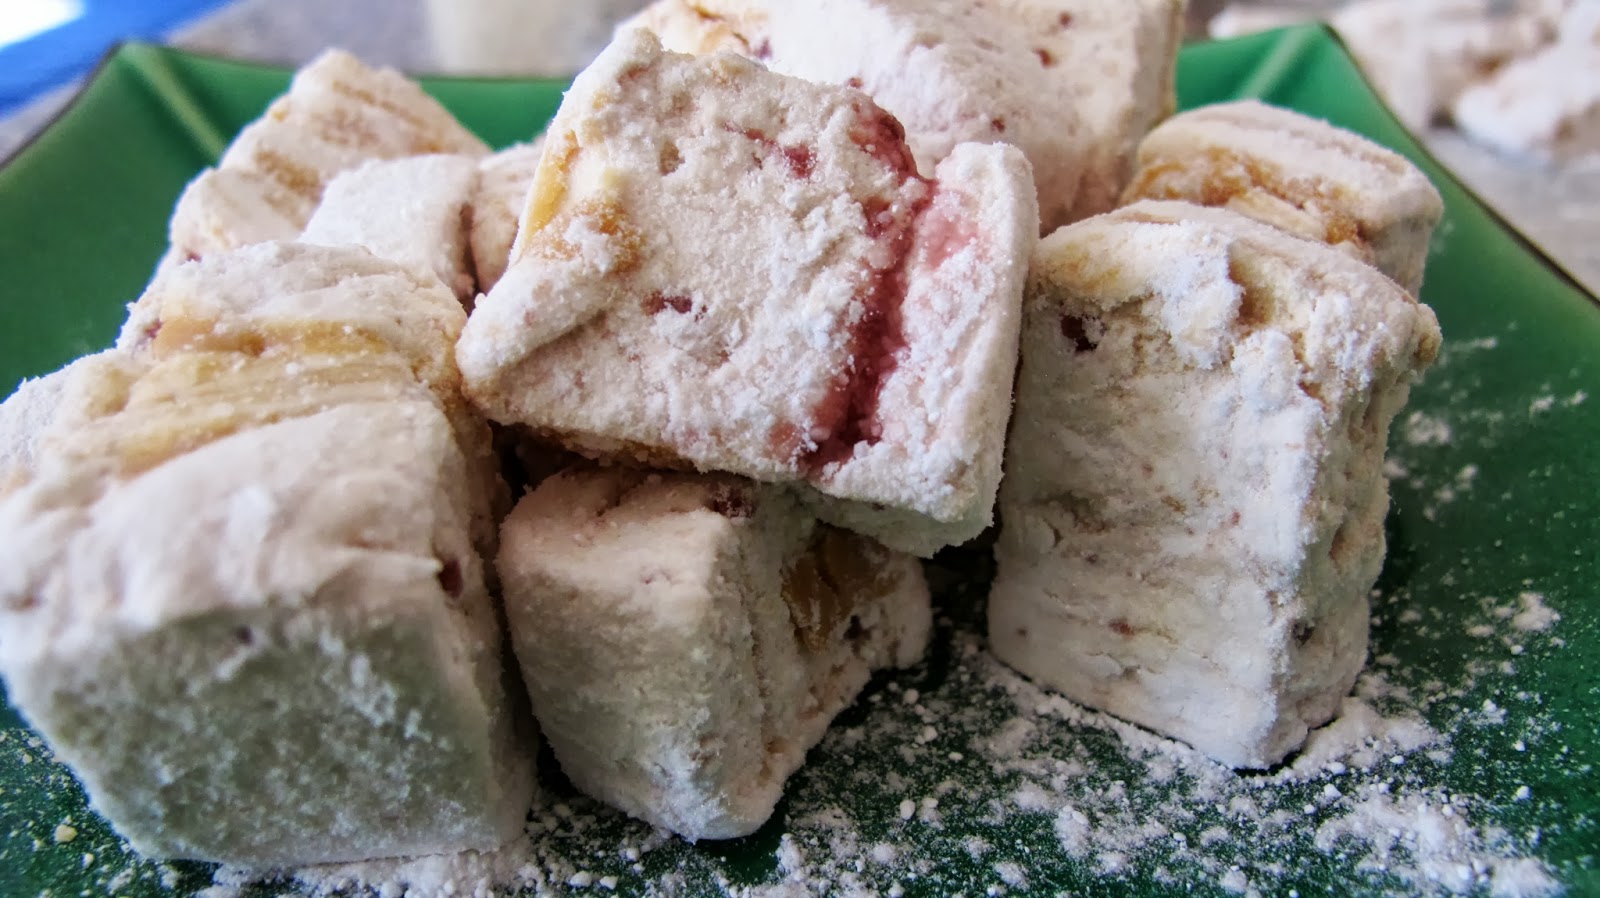
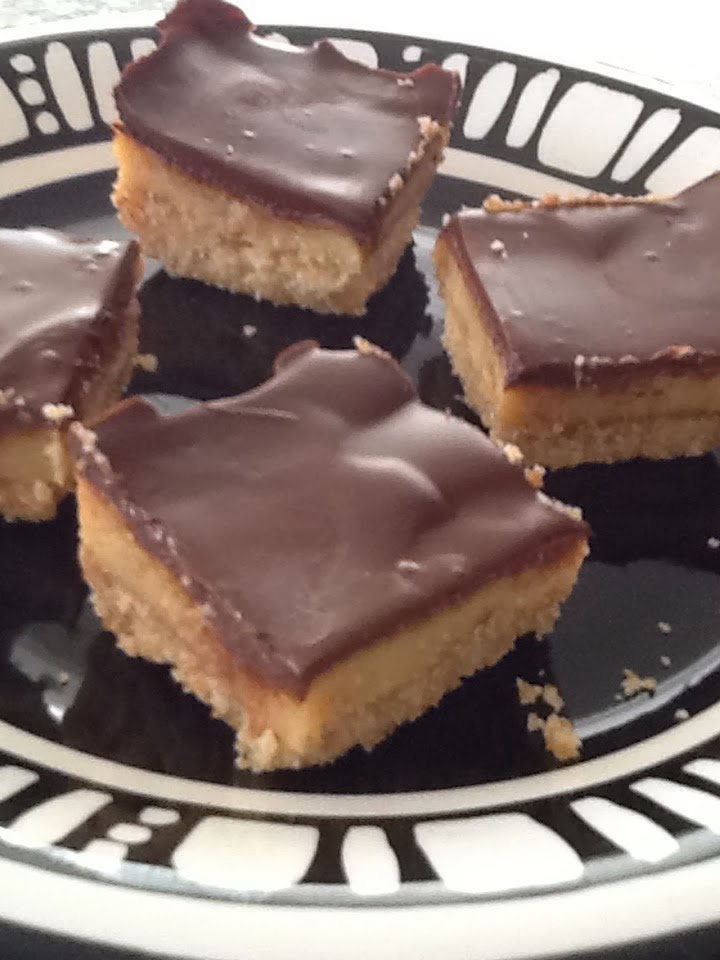
Friday, April 9, 2010

Don't panic!


THE other week I decided to make an apple custard teacake to take to my mum's place. I'd torn the recipe out of Good Living a year or so ago and never gotten around to making it, but I had a few Granny Smiths in the fruit bowl that needed to be eaten, so it seemed like the perfect fit.

Filled with enthusiasm, I began with the custard. I heated the milk and vanilla until it was steaming but not boiling; whisked the egg yolks with the caster sugar until thick and creamy; carefully poured the hot milk in a thin stream over the yolk mixture until it was combined and smooth; filled the sink with ice water in case of any sudden curdling; then transferred the would-be custard back in to the saucepan and stirred over a low heat.

Then - panic! I turned away to check on the time, stopped stirring, and a dirty great lump appeared, right in the middle of my milky mixture. Thank God I filled the sink, I thought, and plunged the saucepan in the cold water and beat until the mixture smoothed out again.

The only trouble was that now I had a smooth mix, but it was still the consistency of milk, not - as my boyfriend thoughtfully (and helpfully) pointed out - the consistency of custard. And certainly not like the custard his mother used to make. I'd panicked too early, he suggested.

I made the custard cake anyway but it was not like I had imagined it to be, so this week I was determined to make custard until I bloody well got it right ... or at least until it was like Dicko's mother used to make.

As I often do in times of stress, I thought: What would Nigella do? And pulled How To Eat off the shelf. Sure enough, Nigella knew. She recommends using single cream, or pure cream as it's called on my supermarket shelf, and she's incredibly helpful in offering up both a set recipe and a set of guidelines on the quantities of ingredients used.

For every egg yolk used, Nigella says, you'll need 100ml of cream and a heaped teaspoon of caster sugar. You can either infuse the milk with a vanilla pod or stir in about a teaspoon of vanilla extract at the end.

Determined not to panic, I took a deep breath and began. 200ml of cream, heated almost to boiling point, was poured on top of two egg yolks and two teaspoons of sugar that had been whisked together (in the KitchenAid; yeah, I'm lazy) until thick and lightened in colour. Then I washed and dried the saucepan, as Nigella recommends, poured the mix back in and started stirring over low to moderate heat.

It would take 8-10 minutes, Nigella said, and after eight minutes I had, well, milk. But I was determined not to panic, and I kept stirring. Then 10 minutes had gone past. I still had milk. There was swearing. I still had hope, though: it smelled like custard. Surely I hadn't done anything wrong - had I?

I kept stirring, and lo and behold, after 12 minutes there was a visible thickening. I could hardly dare to believe it. Did I have custard? I kept stirring until the 15-minute mark, took it off the stove and gave it a good solid beating in the cold water in the sink.

"That looks more like the custard Mum made!" Dicko said encouragingly.

I popped it into the fridge to chill and made a few meringue nests out of the two egg whites I'd saved from the custard. Then it was the moment of truth: the custard came out of the fridge and I swirled the saucepan. No movement! I stuck my finger in (yes, lazy and disgusting) and it tasted like custard. I took it over to Dicko for the final say.

"That's the custard Mum used to make!"
As you can see from the top of the post, we had it on top of the meringue nests with some berries. Best pavlova ever.


Friday, January 1, 2010

Merry Christmas and a happy new oven!


PLEASE forgive my long silence. The last few months of 2009 passed in a whirl of renovating, moving and swearing - the last item, obviously, caused by the first and second items!

Part of the move, however, was having a whiz-bang new cooktop and oven installed. I cannot describe the hours I lay awake at night agonising about the cooktop and oven: what if I'd measured the holes wrong? What if the new appliances arrived and were the wrong size, the wrong shape, the wrong voltage? What if I just picked the wrong ones? My God, the stress!

But they arrived, and they fit (with a bit of tweaking) and for two weeks I was too scared to do anything more difficult than boil the kettle on the cooktop and toast a sandwich in the oven (which, might I point out, has a special setting for grilling small things like sandwiches or a single chop; I love my oven). I would sit for minutes on end gazing lovingly at the stainless-steel wondrousness of the business end of the kitchen, but I couldn't quite work up the courage to use any of it.

Luckily, Christmas came along.

Every year I take some sort of dessert to my family Christmas, whether I've been asked to or not. I'm not sure whether that makes me a fabulous guest or a really annoying one. This year I was determined to make cupcakes, to give me a chance to use my brilliant cupcake carrier, and in keeping with the Christmas theme I settled on rocky road cupcakes.

To test out both the cupcakes and the oven, I did a test run the week before Christmas, obsessively reading the oven instruction manual to make sure I had the cakes on the right shelf, the right tray, so on and so forth (attentive readers may have noticed that "she'll be right, mate" isn't really part of my vocabulary).

And lo and behold, the cakes (carefully placed on the middle shelf, on a wire rack) rose perfectly evenly, perfectly brown and perfectly cooked. New oven, welcome to the family.


Rocky road cupcakes

Makes about 20

To make the cupcakes


2 tbs cocoa powder

(The recipe says one quantity makes 12 cupcakes. I found it only made 10, or 11 slightly smaller ones, but I do use a Texas cupcake tin, so that probably explains it.)

Once you've made your cupcake batter according to Nigella's recipe, spoon half of it into 10 patty-lined cupcake holes. Put those in an oven pre-heated to 200C, and to the remainder of the batter add the cocoa powder and beat well.

Spoon the chocolate cupcake batter into the patty pans and bake for 10-15 minutes, or until a skewer stuck in the middle comes out clean.

To make the milk chocolate rocky road

150g milk chocolate
150g dark chocolate
150g marshmallows, quartered
100g glace cherries, quartered
a healthy sprinkling of desiccated coconut

Melt the chocolates together and mix in the marshmallows, glace cherries and coconut. Go by eye - if the chocolate looks too runny, toss in a few more marshmallows, cherries, nuts or whatever.

Do the same for the white chocolate rocky road, but with 300g of white chocolate.

To assemble

Using a sharp, pointed knife, cut a circle in the middle of each cupcake and scoop out the inside, as if you are making butterfly cakes. The cake innards can be frozen to make a trifle, or just left in the pantry and eaten over the next few days if you're anything like me.

Use two teaspoons to pile a generous scoop or two of rocky road into each cupcake - white chocolate rocky road for the chocolate cupcakes, milk chocolate rocky road for the vanilla cupcakes.

Dust with sprinkles or other decorations if desired and allow to set at room temperature.

Friday, October 30, 2009

The ultimate chocolate cake


WHO would have thought that the ultimate chocolate cake would be lurking right under my nose all these years?


It’s been quite a few years now since I, while poking through a newsagent’s to escape a sudden shower, spotted a Women’s Weekly Chocolate Cakes cookbook, half-hidden behind dodgy wedding magazines and a couple of stray birthday cards thoughtfully posted on the wrong shelf by a bored toddler. I bought it, of course – hello, a book devoted entirely to chocolate cakes? Come on – but for some reason, every time I thought to bake something from it, I got distracted, didn’t have the right ingredients … the list went on.


Then, a month or so ago, on a night when I was home alone and feeling peckish, I picked it up, glanced at the recipe for the family chocolate cake and thought, what the hell? It wasn’t the sort of recipe I usually make – no creaming of butter and sugar, my favourite part of the baking process – but I pulled out a saucepan, stirred the melting butter and baking powder mixture assiduously to ensure it didn’t boil over, and held my breath as I slid the quite-liquid batter into the oven.


But when I’d iced it, sliced it and taken my first bite – my god. I inhaled the (rather, um, large) slice I’d cut and it was all I could do to stop myself from eating the rest of the slab. It was soft, moist, still warm, thanks very much, with a slightly caramelised crunch on the top that melted into the fudgy icing. It was so good I pulled out the laptop and emailed pictures to my boyfriend at work: “OH MY GOD YOU SHOULD SEE THE CAKE I JUST BAKED”. It was just as good the next day, too: still soft and moist, with a deliciously fudgy interior to make up for the lack of straight-from-the-oven warmth.


It was so good, in fact, that I made it again not a fortnight later. This time with the help of my four-year-old niece, who I hoisted up on to my hip so she could stir the buttery icing mixture before she sat on the bench and sifted the icing sugar over the bench, over us, into her mouth - and even into the bowl.


Family chocolate cake

Adapted from the Women's Weekly Chocolate Cakes cookbook


1 cup water

1 1/2 cups caster sugar

125g butter, chopped

20g cocoa powder

1/2 tsp bicarb soda

1 1/2 cups self-raising flour

2 eggs, lightly beaten


Chocolate fudge icing


90g butter

1/3 cup water

1/2 cup caster sugar (I used slightly less)

1 1/2 cups icing sugar

1/3 cup cocoa powder


Preheat oven to 180C and grease and line a 22cm round cake tin


Place water, butter, sugar, sifted cocoa powder and bicarb soda in a medium-large saucepan and stir over medium heat until sugar dissolves. Bring to a boil, reduce the heat and simmer for 5 minutes. Watch it, it will bubble up.

Transfer to bowl of mixer (or medium bowl) and allow to cool.

Add sifted flour and egg and beat until batter is smooth and a paler colour.

Pour into tin and bake for 50 minutes or until a skewer comes out clean.

Top may brown rapidly - it can be covered with a piece of foil but I really like the crunchy top

Let the cooked cake cool in the tin for 10 minutes before turning out onto a rack to cool completely.


For icing, place water, sugar and butter in a saucepan and stir until sugar dissolves.

Sift icing sugar and cocoa into a small bowl and gradually beat in the butter mixture. It will be very liquid.

Refrigerate, covered, for about 30 minutes or until thickened to your satisfaction.

Beat with wooden spoon until spreadable and pour over cooled cake.


Friday, October 16, 2009

Around the world for a pie


HERE in Sydney, the past few weekends have been a sporting smorgasbord.

Three weeks ago it was the AFL Grand Final. Two weeks ago it was the NRL Grand Final. This weekend just gone was Australia’s biggest car race, the Bathurst 1000.

What else is a girl to do but make meat pies to go with the frolicking on the field?

You’d be hard-pressed to find anything more Australian than a meat pie, but it’s the joy of the internet era that I made Clotilde’s olive oil pastry for the bases of my pies. I had been planning to try out Maggie Beer’s sour cream pastry but a bit of forgetfulness at the shops on Saturday morning ruled that out, and there’s something very 2009 about using a Parisian pastry for an Aussie staple.

It was fabulous, too, may I say, especially for someone who tends to have a heavy touch with pastry – easy to knead and roll out and beautifully short and flaky in the finished product, with the herbs - I used oregano, coriander and a touch of cumin - adding a lovely bit of flavour.

The filling originally called for two tablespoons of Worcestershire sauce and the flavour was a little overpowering, so I’ve knocked it down to one tablespoon in my recipe below.

Served with mashed potatoes, peas and a generous slathering of tomato sauce (which I forgot to take a picture of - what an amateur!) it was waaaaaaaaaaaaaaaaaay better than anything you could get at the footy.

Oh, I almost forgot - I had a bit of filling left over after making the pies, which I have whacked in the freezer with the thought of making a nice easy pasta bake in the next week or so.


Meat pies


Makes 4 individual pies


1 tbs olive oil

1 large brown onion, finely chopped

1 carrot, julienned

1 zucchini, diced

A generous handful of button mushrooms, chopped

500g lean beef mince

1 tbs cornflour

3/4 cup beef stock

3/4 cup tomato sauce

1 tbs Worcestershire sauce

1 tbs barbecue sauce

1 tsp Vegemite

1 quantity Clotilde's olive oil pastry

1 sheets frozen puff pastry, thawed

1 egg, beaten


Heat oil in a saucepan over medium-high heat. Add onion and vegetables and cook until onion is soft.
Add mince and cook, breaking up lumps with a wooden spoon, until browned. Toss in cornflour and cook, stirring for 1 minute.
Add stock, sauces and Vegemite to mixture. Bring to the boil, reduce heat to medium-low and simmer for 8 minutes or until thick. Allow to cool.
Preheat oven to 220°C.
Make the olive oil pastry, divide into quarters and roll out to fit four 10cm pie plates. Allow to rest in the fridge for 20 minutes.
When the pastry is ready, scatter some breadcrumbs on the base (this helps to soak up the juices and keeps your pastry from going soggy) and spoon in the cooled mince mixture.
Cut puff pastry sheet into quarters and use a little water to stick each quarter on a pie, cutting pastry to fit.
Brush with beaten egg, season and use a sharp knife to slit the lid to allow steam to escape.
Bake for 20-25 minutes or until golden.


Friday, September 11, 2009

A taste of support


ON MY trip to France earlier this year, I headed to Monte Carlo for this year’s Grand Depart of the Tour de France.

The steep, cobblestoned streets were full of excited cycling fans milling about, checking out the sights, ogling the giant superyachts in the harbour, staking out their positions for the start of the time trial that would begin the three-week race.

And each and every one, all 40,000 of them, was wearing a yellow LiveStrong wristband. Every person there knew the story of the cycling star who had won seven Tours de France, the toughest sporting event in the world, and - a harder battle yet - had fought, and beaten, 14 cancerous tumours.

Each and every one knew Lance Armstrong’s story and had come to see his return to the race that has almost become synonymous with his name. When he flew past us on his way up the first hill of the time trial that summer's day in Monte Carlo, the cheer that went up was defeaning.

The thing about Lance Armstrong's story that I think reaches most people, cycling fans or not, is this: I bet every person in Monte Carlo to watch his return to the great race would know someone with cancer. Everyone bought a yellow wristband and wore it proudly to show that they might not be able to come up with the cure for cancer, but they were going to support the fight any way they can.

That, too, is why I'm writing this as part of Barbara from Winos and Foodies' annual LiveStrong With A Taste Of Yellow Day, along with dozens of other bloggers from around the world. We might not be able to cure cancer by cooking, but we can show our support and love with a lemon cake or two. And with support like that, this battle against cancer is a fight we must win.

While I’m on the subject, can I urge every woman out there who hasn’t done so yet to talk to their doctor about having the cervical cancer vaccine. I know there's been a lot of talk about possible side-effects, but I have had the entire course, experienced nothing worse than the usual pain from an injection, and am so happy to be doing one extra thing to help stop cancer's spread. And since experts now think it helps older women, and maybe even men, as well as the younger women at whom the vaccine has previously been targeted, clearly the benefits far outweigh the risks. Please, go get it today; put a note on your phone calendar and go back for the full course of three shots. It's seriously well worth it.


Lemon butter cake

This is one of my favourite cakes because it's bloody easy and bloody versatile. I made it today as a simple lemon butter cake with lemon icing, but it also works really well as a syrup cake and it works with any type of citrus.

125g butter
1 cup caster sugar
2 eggs
1 cup self-raising flour
1/2 cup plain flour
1/2 cup milk
1/2 tsp salt
the rind of a large lemon

Preheat oven to moderate and grease and line a loaf tin.

Cream butter well, add sugar and beat until combined and mixture is almost white.

Add eggs one at a time, beating well after each addition.

Sift flour and salt and add alternately with the milk.

Pour batter into prepared tin and bake for 30-40 minutes or until cake springs back and a skewer comes out clean.

for lemon butter icing

80g butter
1 cup icing sugar
1 tbs lemon juice or to taste

Cream butter well. Sift icing sugar and beat into butter. Add lemon juice and beat until the icing has reached your preferred taste.

for lemon syrup

Juice of that large lemon you zested earlier
1/4 cup caster sugar

Mix juice and sugar together and stir until sugar dissolves. When cake is cooked and still warm from the oven, pour lemon juice mix over the top. Leave to cool in tin.


Saturday, August 29, 2009

New tricks


WHEN it comes to non-fattening crafts, I've always been a cross-stitcher.


It's a wonderful craft, intricate enough to demand your whole concentration but simple enough to be relaxing. The only trouble with it is that it's not really very practical - all of my nieces and nephews have cross-stitched birth notices, and my mum has a vast array of pieces, of varying quality, but there are only so many pieces of cross-stich you can fob off on friends and family.


So I had to find a new hobby and, since I suck at knitting, I thought I'd try my hand at crochet. I bought a kit and optimistically signed myself up for a one-day Learn To Crochet class at a local needlework store so I would have some idea of how to follow the "easy-to-follow" instructions in my flash new kit.


After about an hour in the class, though, I was just about ready to fall back on my cross-stitched cushion and sob like a little girl. The room in which the class was being held was freezing, my hands were numb and while all the other women around the table were halfway through their first granny square, I was staring at a line of knotted yarn that looked like it'd fallen off HMS Endeavour.


What the hell was I doing wrong? Buggered if I knew. Buggered if the teacher knew either - she would unravel the chain of knots I'd spent the past half-hour working on, make a few complicated passes with her hands and return my yarn, magically transformed into proper crochet, then pat me soothingly on the shoulder and head off to the next bewildered student.


I honestly thought about just putting my mass of knots on the table and walking out, but then, almost like the magic rubbed off on me, something clicked. It clicked with five minutes until the end of the class, but there it was - I knew how to create a double crochet stitch.


And that's what is in the picture at the start of the post - a scarf, made entirely out of double crochet stitches. It's a bit wobbly at the ends, and the Wayside Chapel's winter appeal will probably benefit from the next few things I try to make, but I was so proud of my first attempt at crochet I had to mention it.

You have to cook this recipe


I HAD to drop everything and flick straight to Outlook when I got an email from my friend Edie with that subject line. You have to cook this recipe that I saw in a CWA cookbook - how could I resist?

Edie lives in Tasmania, two hours' flight from me in Sydney, but she knows me well, and sure enough my eyes lit up as I read this recipe for Malteser cake.

The original recipe called for vanilla Fruche, but I couldn't find it at the shop so I settled for a mixture of normal vanilla yoghurt and sour cream, which I had in the fridge and which had the added benefit of giving the cake a soft, light crumb. The Maltesers melt through for fantastic little pockets of moist, gooey goodness and the white chocolate on top just finishes it off nicely. It was very hard to stop at one piece!

The only problem is that Edie can't come over for a piece - emails and virtual cake and coffee just isn't the same.


Malteser Cake

Adapted from the CWA Cookbook
1 cup self-raising flour
3/4 cup caster sugar
4 tbs cocoa
150g sour cream
150g vanilla yoghurt
2 eggs
2 tbs vegetable oil
165g Maltesers

Preheat oven to 175C and grease an 18cm square tin.
Sift flour and cocoa into a bowl and add sugar.
In a separate bowl, mix together sour cream, yoghurt, eggs and oil.
Add wet ingredients to dry and stir to combine. Fold through Maltesers.
Pour mix into prepared pan and bake for 25-30 minutes.
To decorate, melt white chocolate by microwaving it for a minute on 50% power. Stir and repeat until fully melted.
Pour into a plastic sandwich bag, snip the corner off and drizzle melted chocolate over cake before cutting into pieces.